Waypoint
You can use our Radar Waypoint apps for iOS and Android to test Radar before integrating the SDK, or to test your implementation of Radar side-by-side with a complete implementation.


Instructions#
To get started, you'll need a Radar account. Don't have a Radar account yet? Sign up first.
Download the app.
Open the app and enter your email address associated with the Radar account.
Copy the 6 digit code sent to your email into the app.
Grant notification permissions and location permissions by following the onboarding prompts.
After completing onboarding, you should see your location on the map in the Waypoint app along with your user on the Users page in the dashboard. If you are in a geofence or at a place, you will see events in the app and see events on the Events page in the dashboard.
To generate a new track call in the foreground, tap the refresh button!
To track in the background, move more than 100 meters! Note that location updates may be delayed significantly by Android Doze Mode and App Standby, iOS Low Power Mode, or if the device has connectivity issues, low battery, or wi-fi disabled.
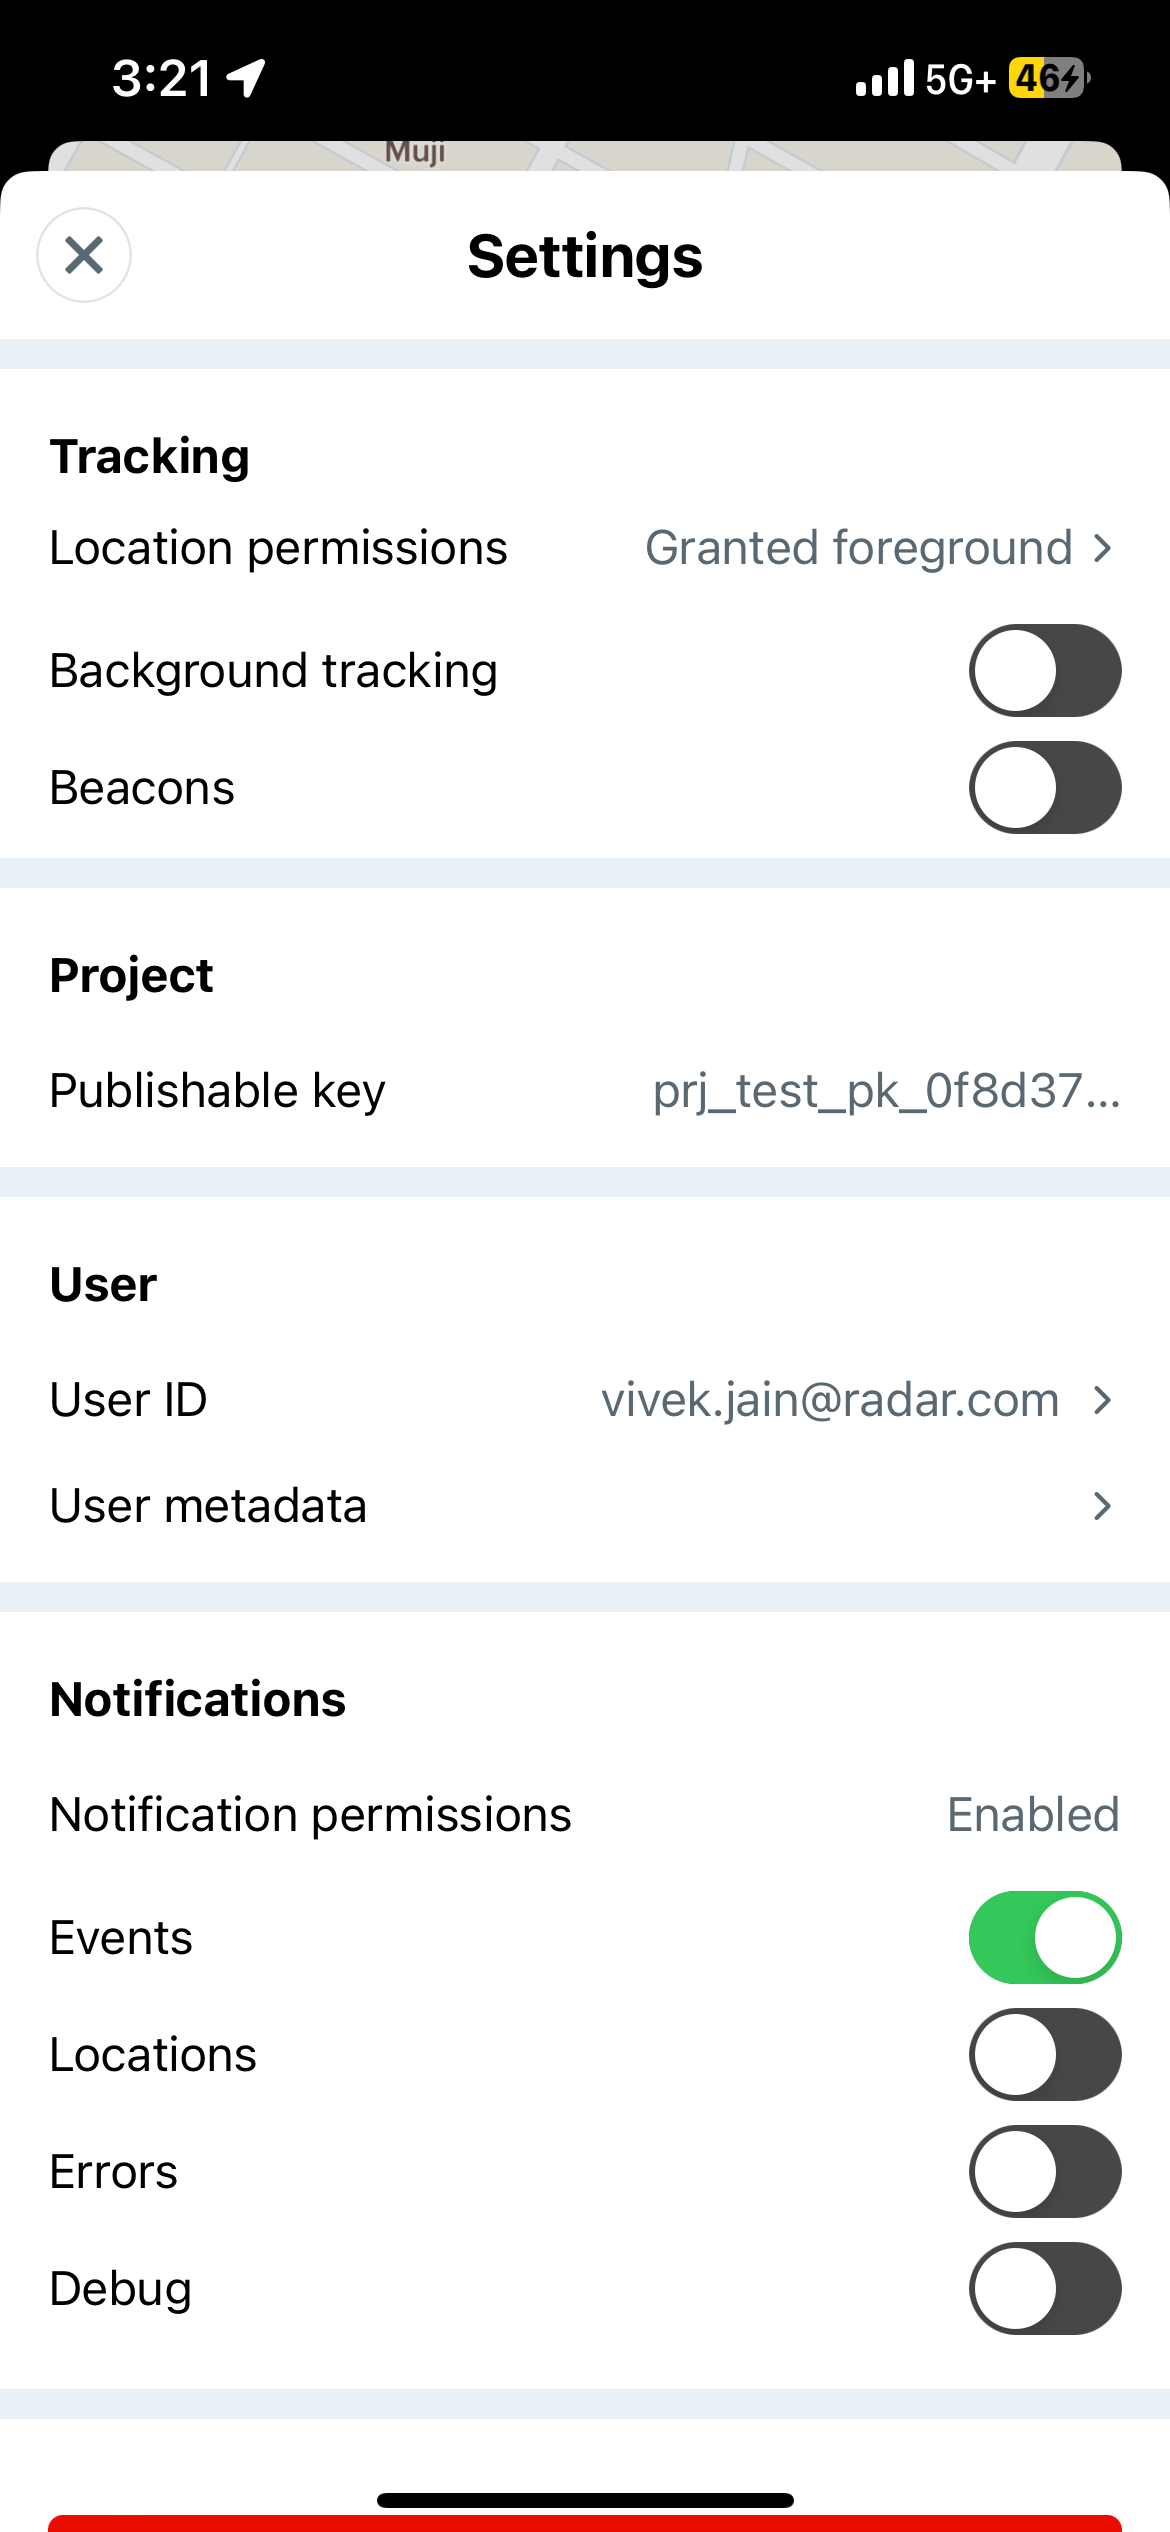
To try out different presets, open the Settings screen. Then, select the Tracking Options preset to use, one of Efficient, Responsive, or Continuous. Learn about iOS tracking presets and Android tracking presets. You can also set Custom Tracking Options via Remote SDK Configurations. Manage the the notifications you want to receive, including Events (events received from Radar), Locations (location updates sent to Radar), and Errors (network, location, and permissions errors).
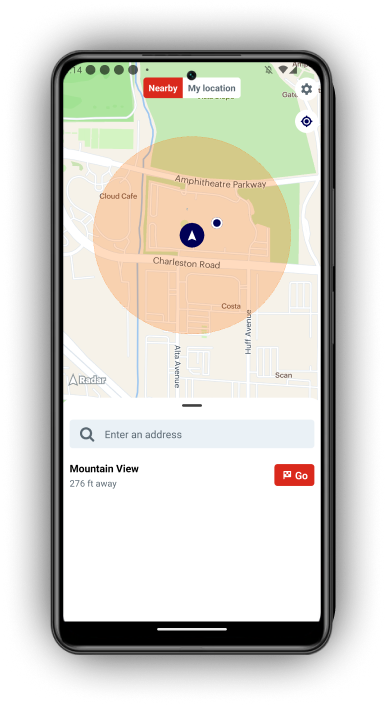
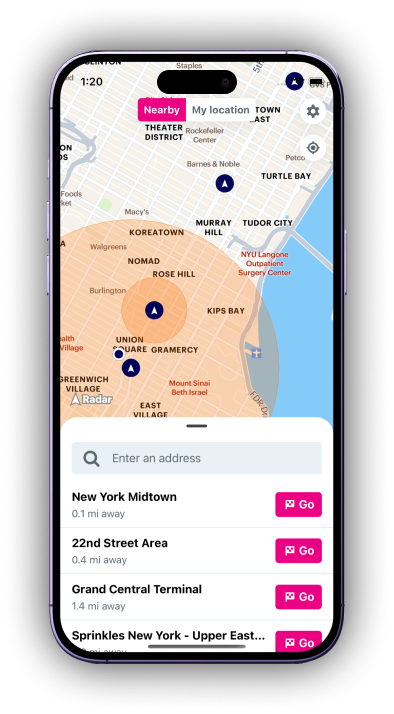
Examples#
Testing On-Premise Mode#
To get started, make sure you've opted-in to foreground or "while in use" permissions and notifications are enabled. Click on the settings icon on the top right to ensure Waypoint is configured correctly (See image A below).
Create geofences in Radar.
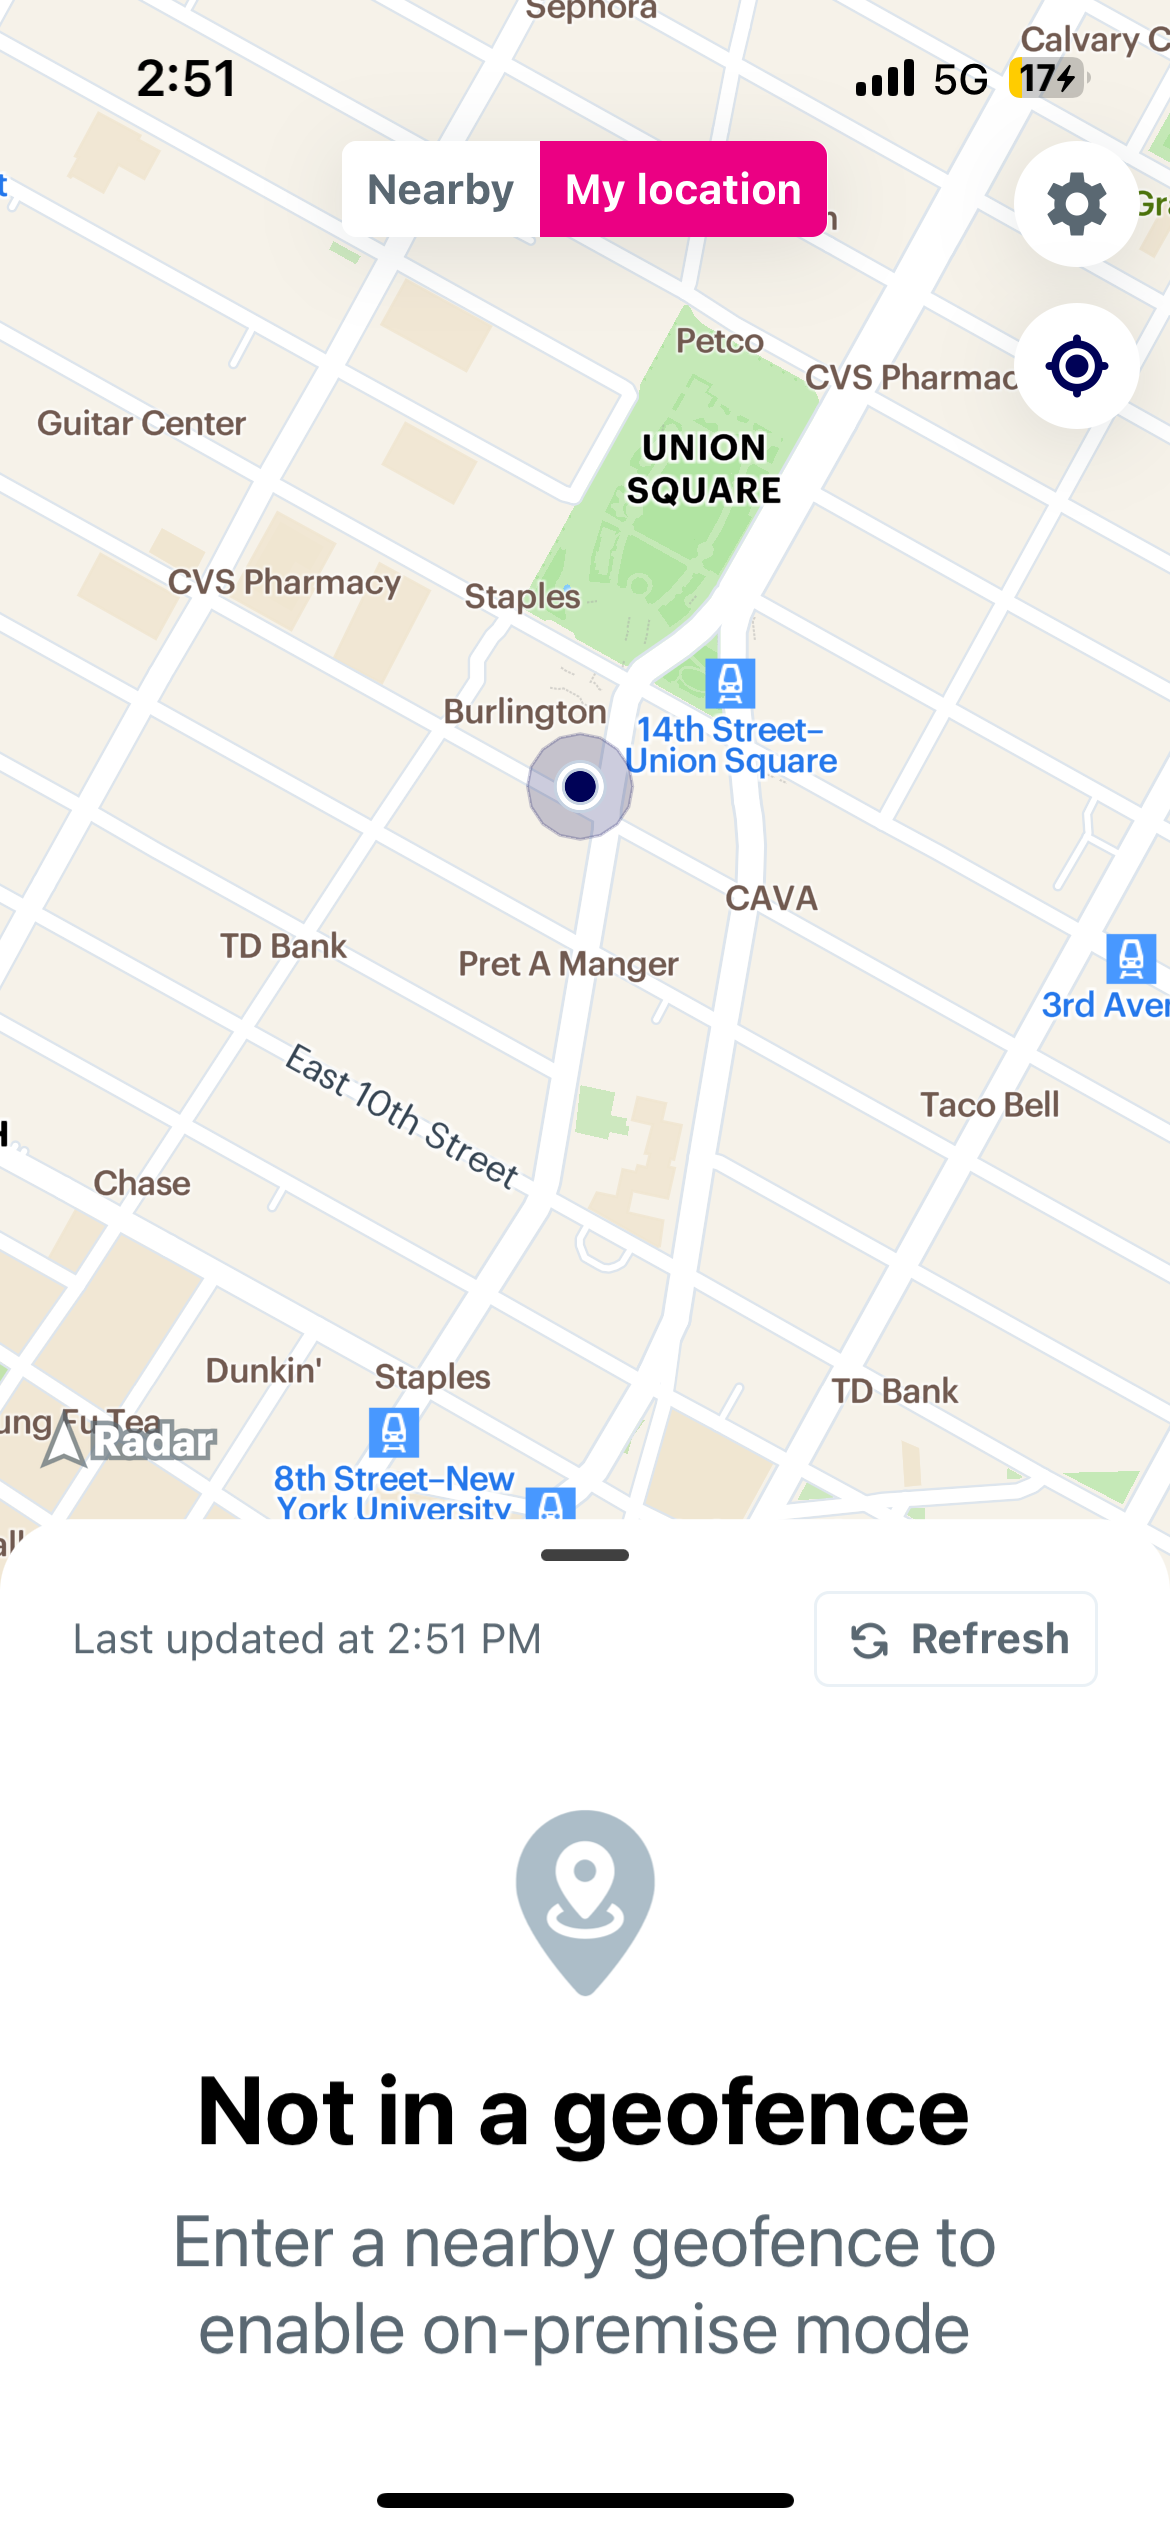
Open Waypoint and navigate to the "My Location" tab. You should see "Not in a geofence". Travel to a configured geofence (See image B below).
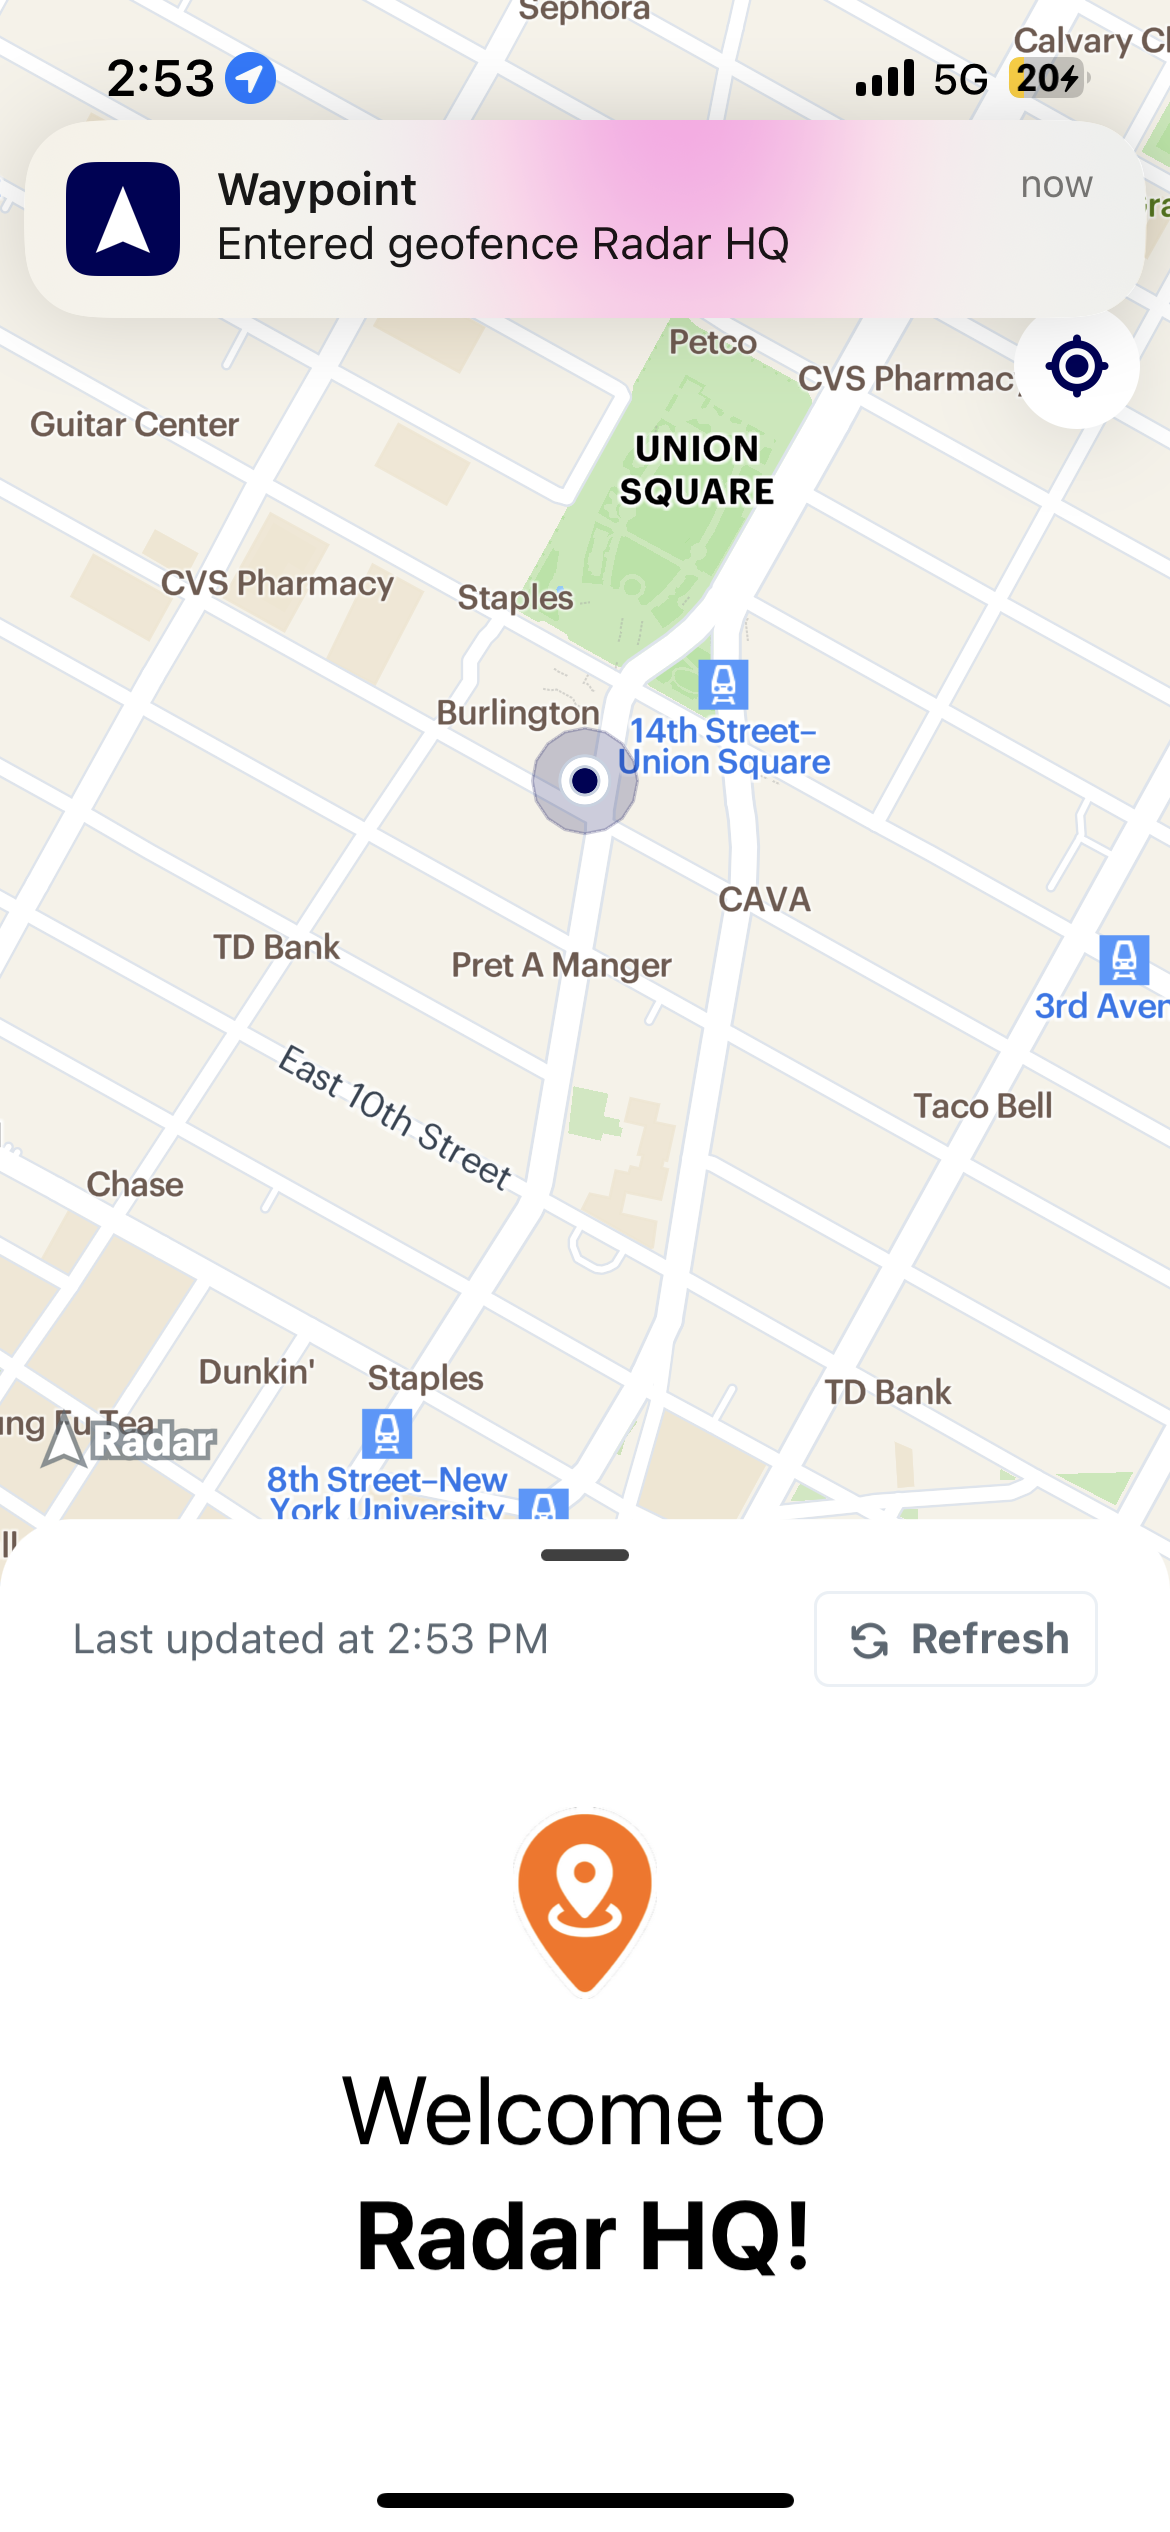
After entering the geofence, open Waypoint, navigate to the "My Location" tab. Waypoint should display "Welcome to <geofence_name>". You should also receive a notification "Entered geofence <geofence_name>" (See image C below).
Testing Trips#
To get started, make sure you've opted-in to foreground or "While in use" permissions and notifications are enabled. (See image A below)
Create geofences in Radar.
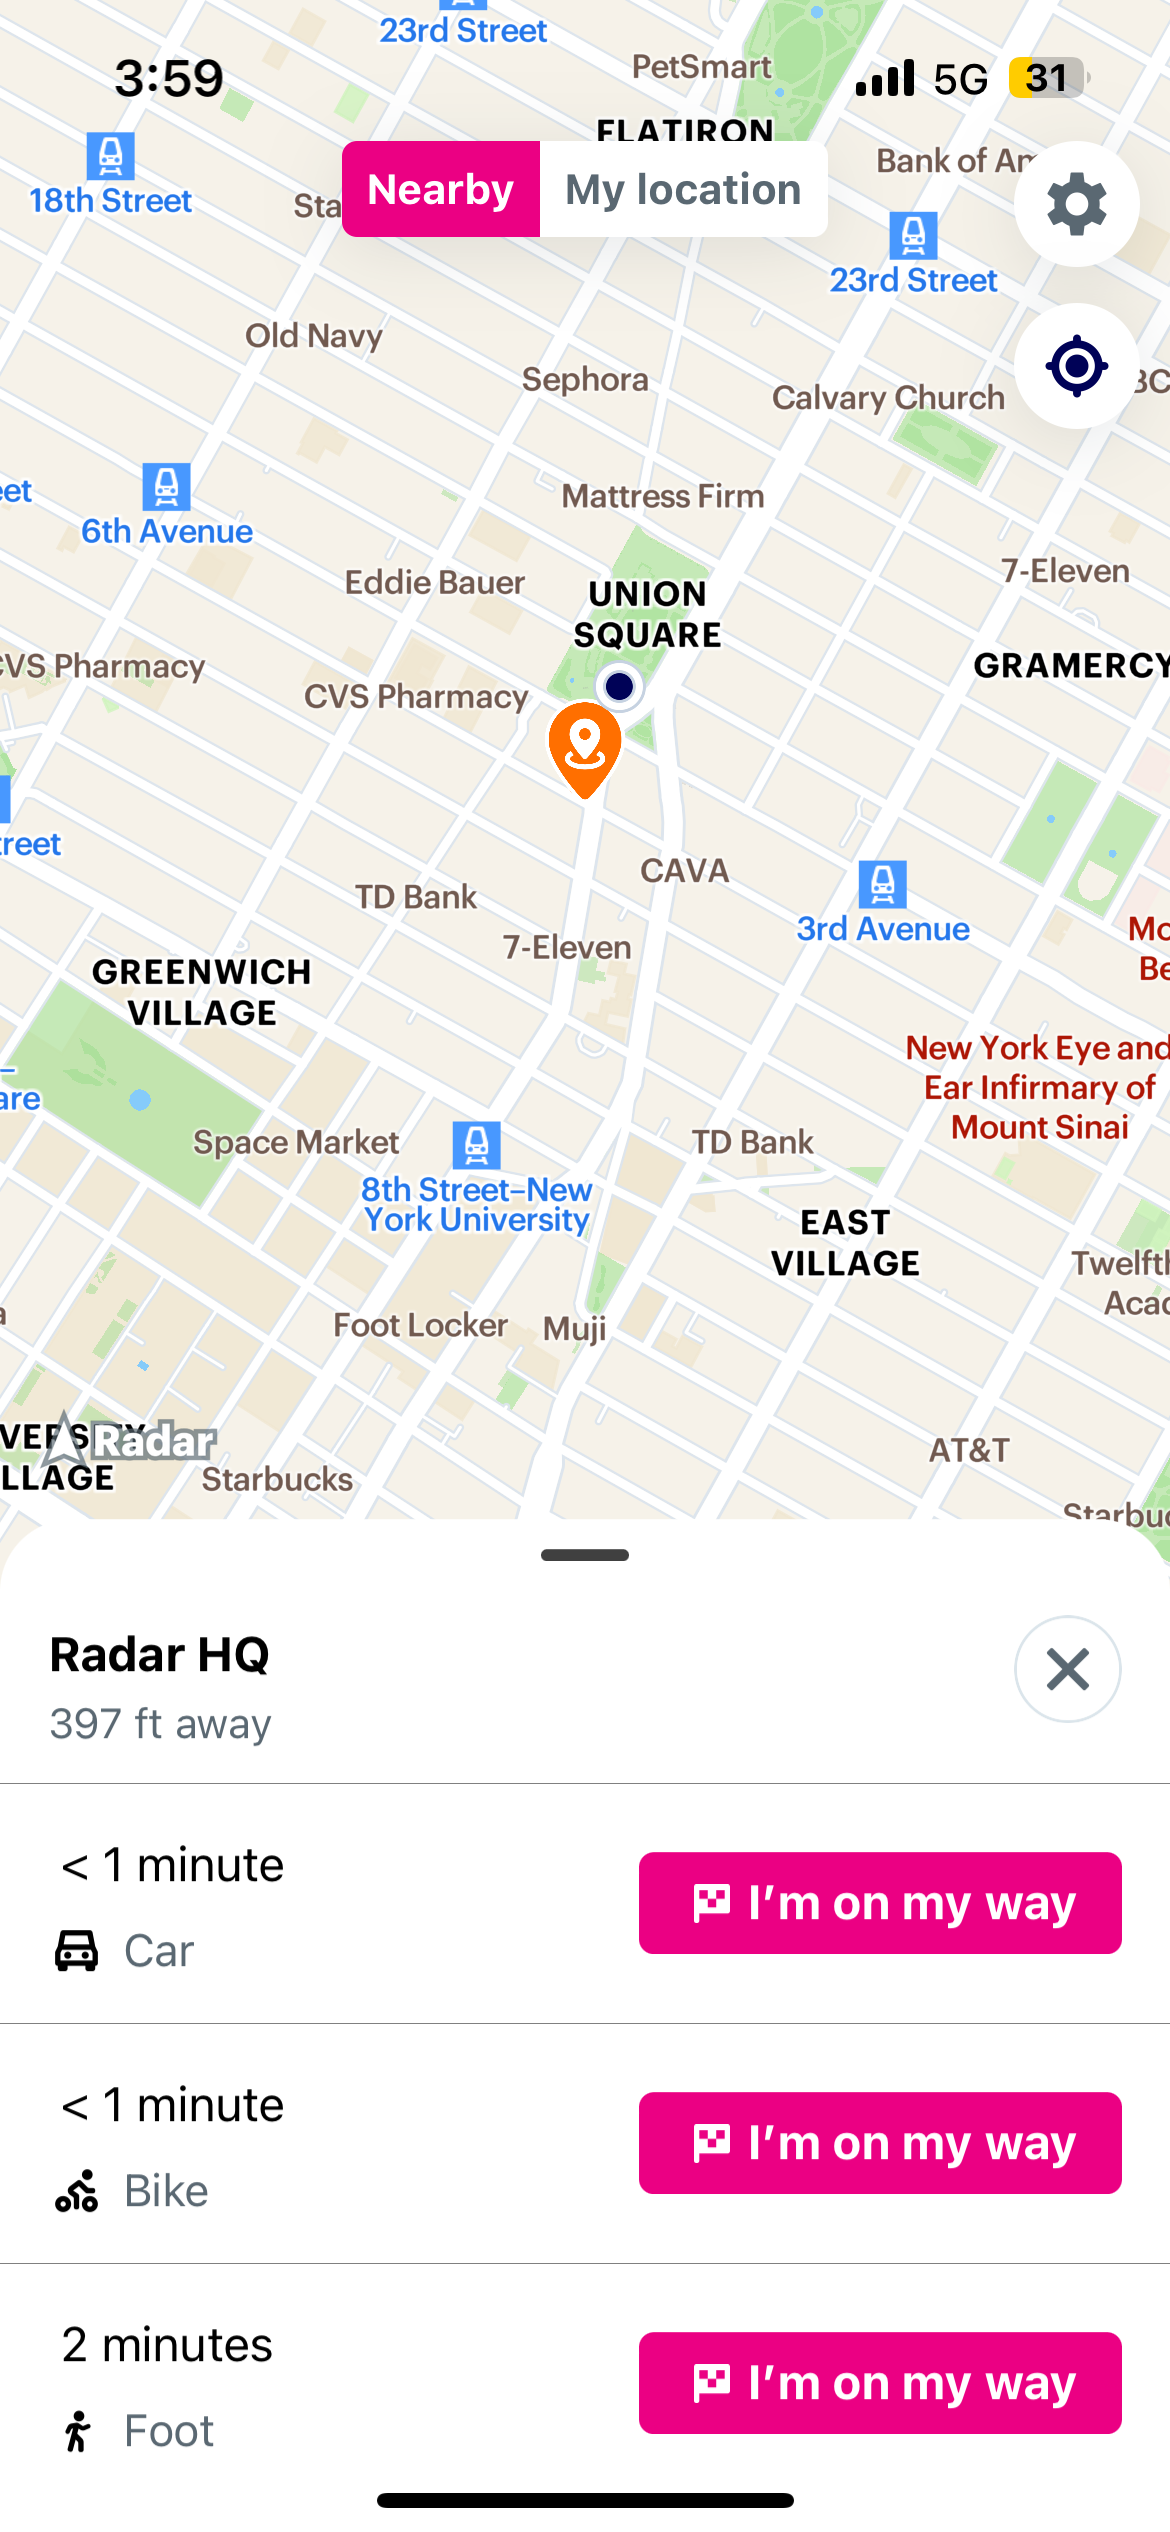
Once you open Waypoint, you should see geofences nearby you. Click "Go" to start a trip to one of the configured geofences. Select your mode of travel from the options provided. Start navigating to your destination geofence. (See image B below)
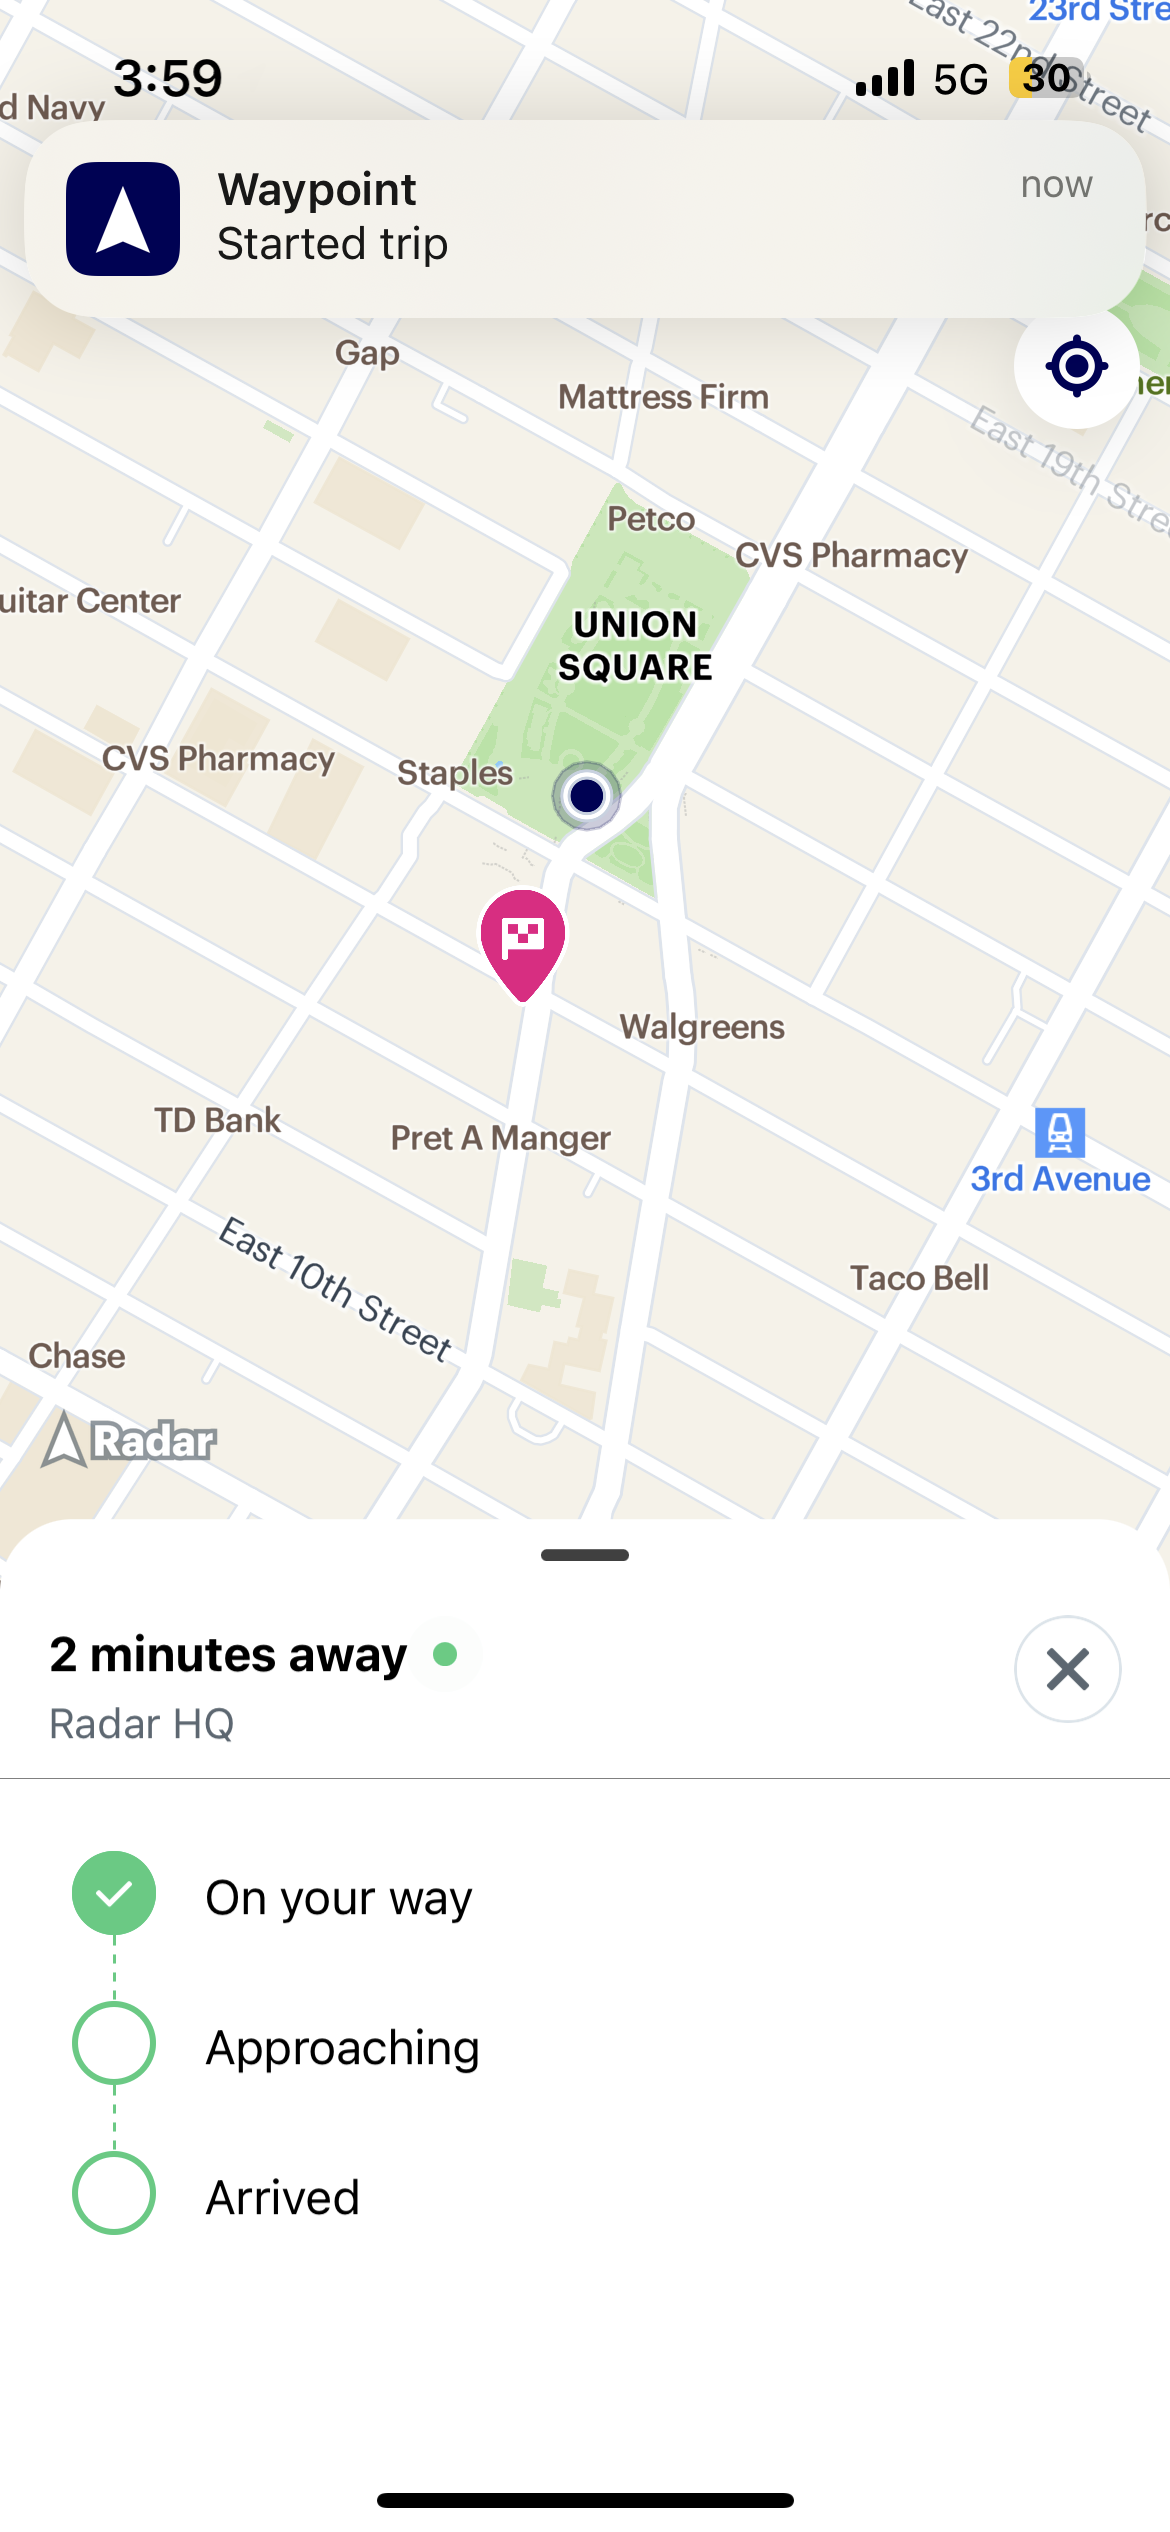
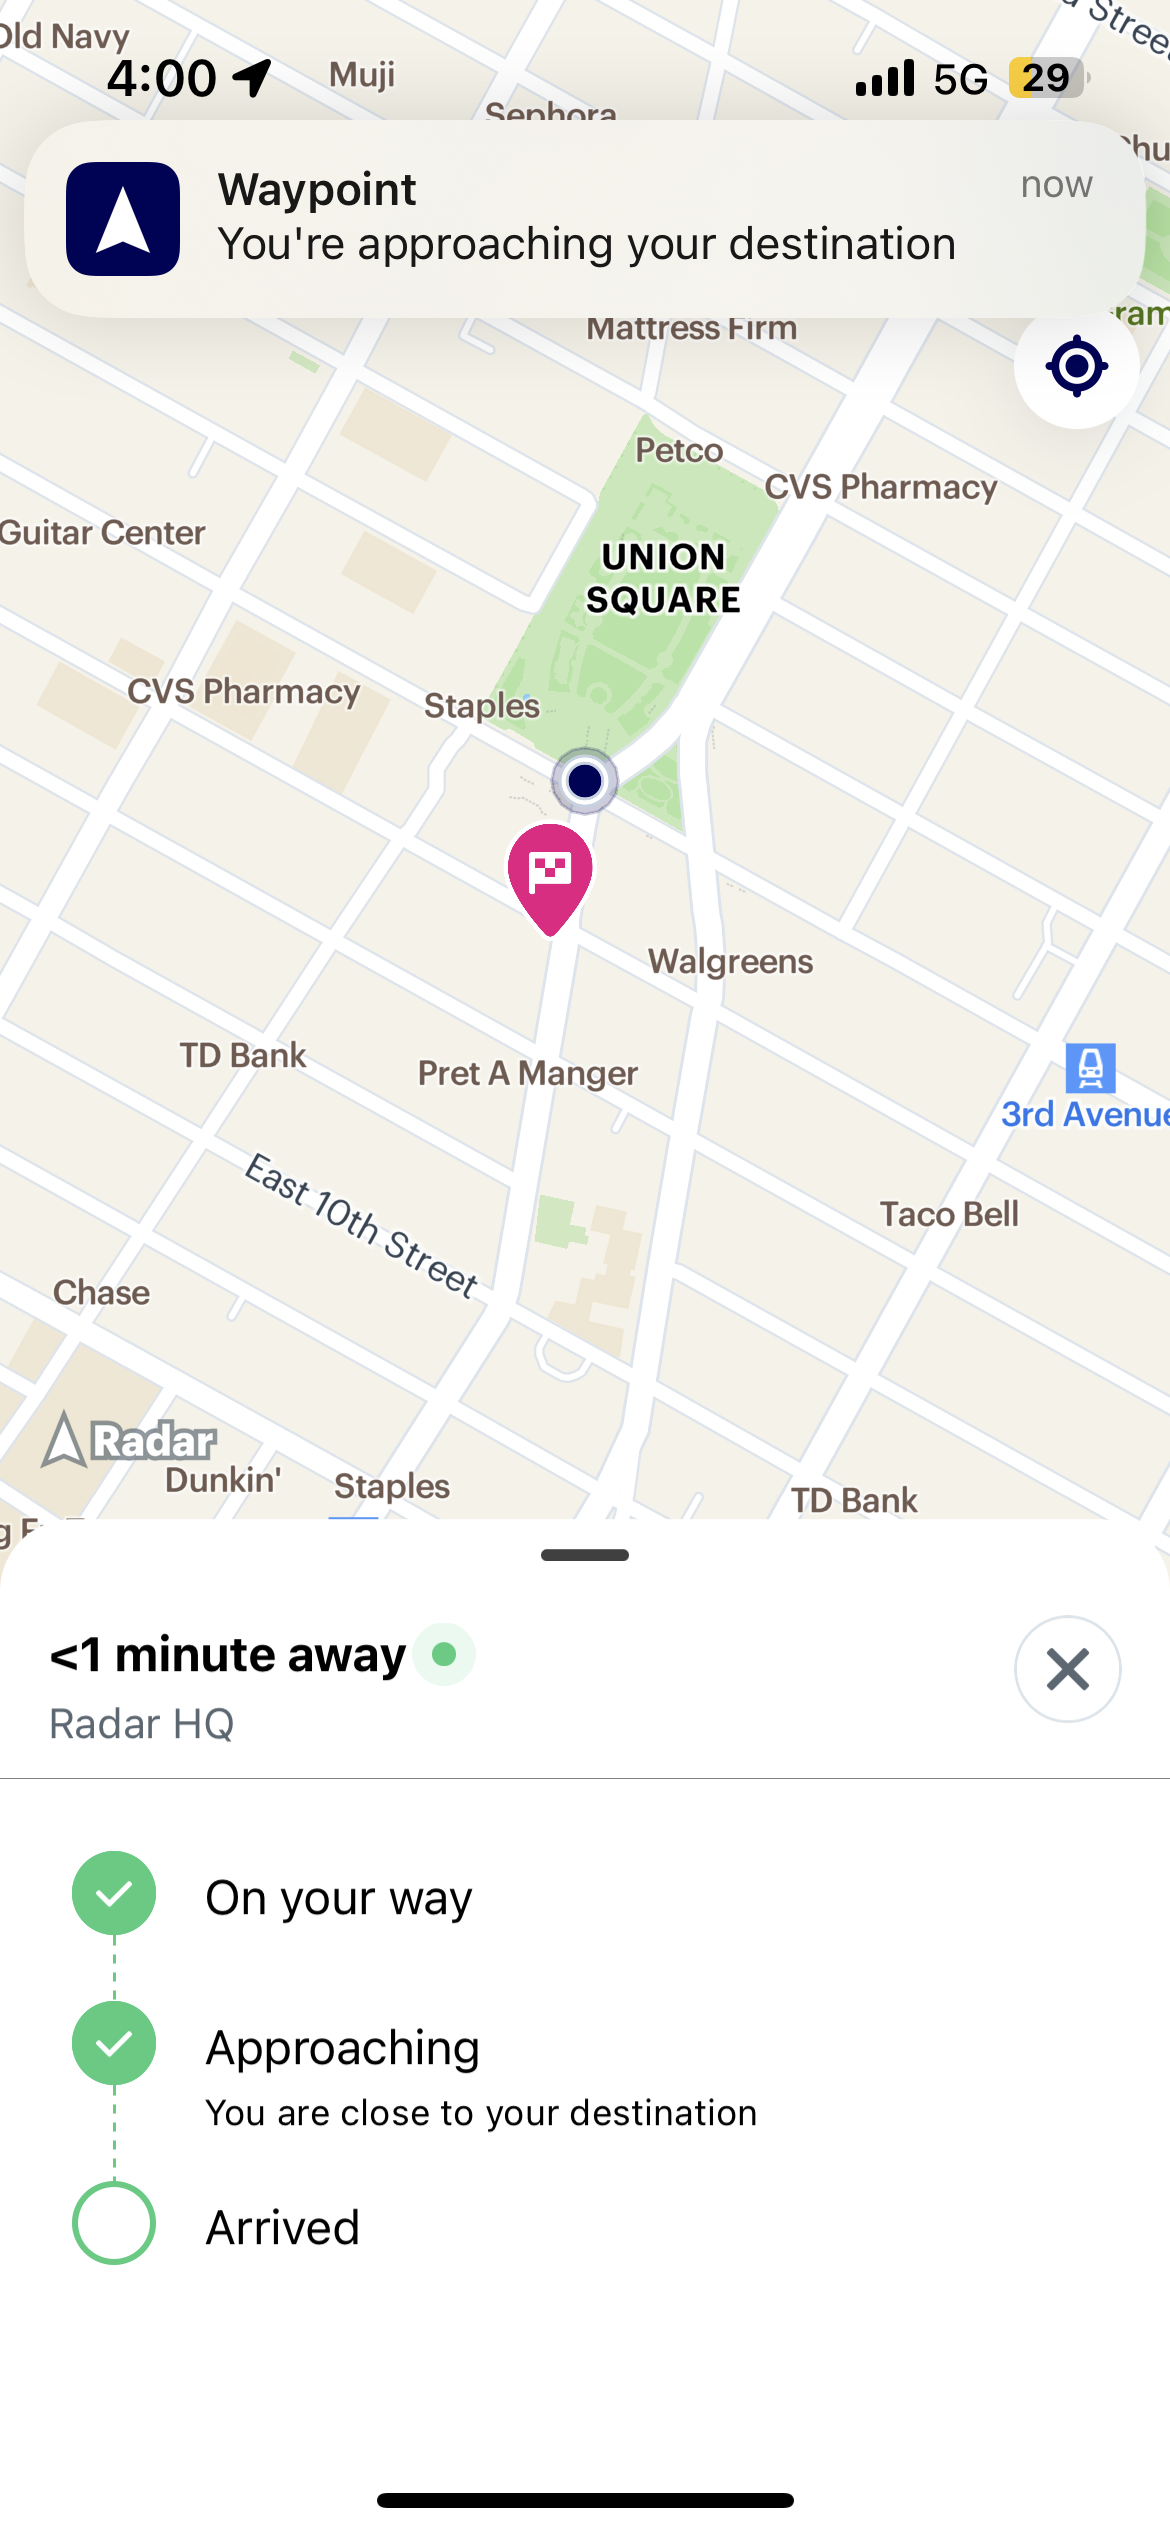
Events & notifications to expect as you travel to the destination geofence (See image C below):
- user.started_trip -> "Started trip" notification from Waypoint
- user.approaching_trip_destination -> "Approaching destination" notification from Waypoint
- Note, approaching threshold can be configured on the Radar dashboard. Navigate to "Settings" on top right -> "Trips" on the left sidebar -> "Approaching threshold (minutes)"
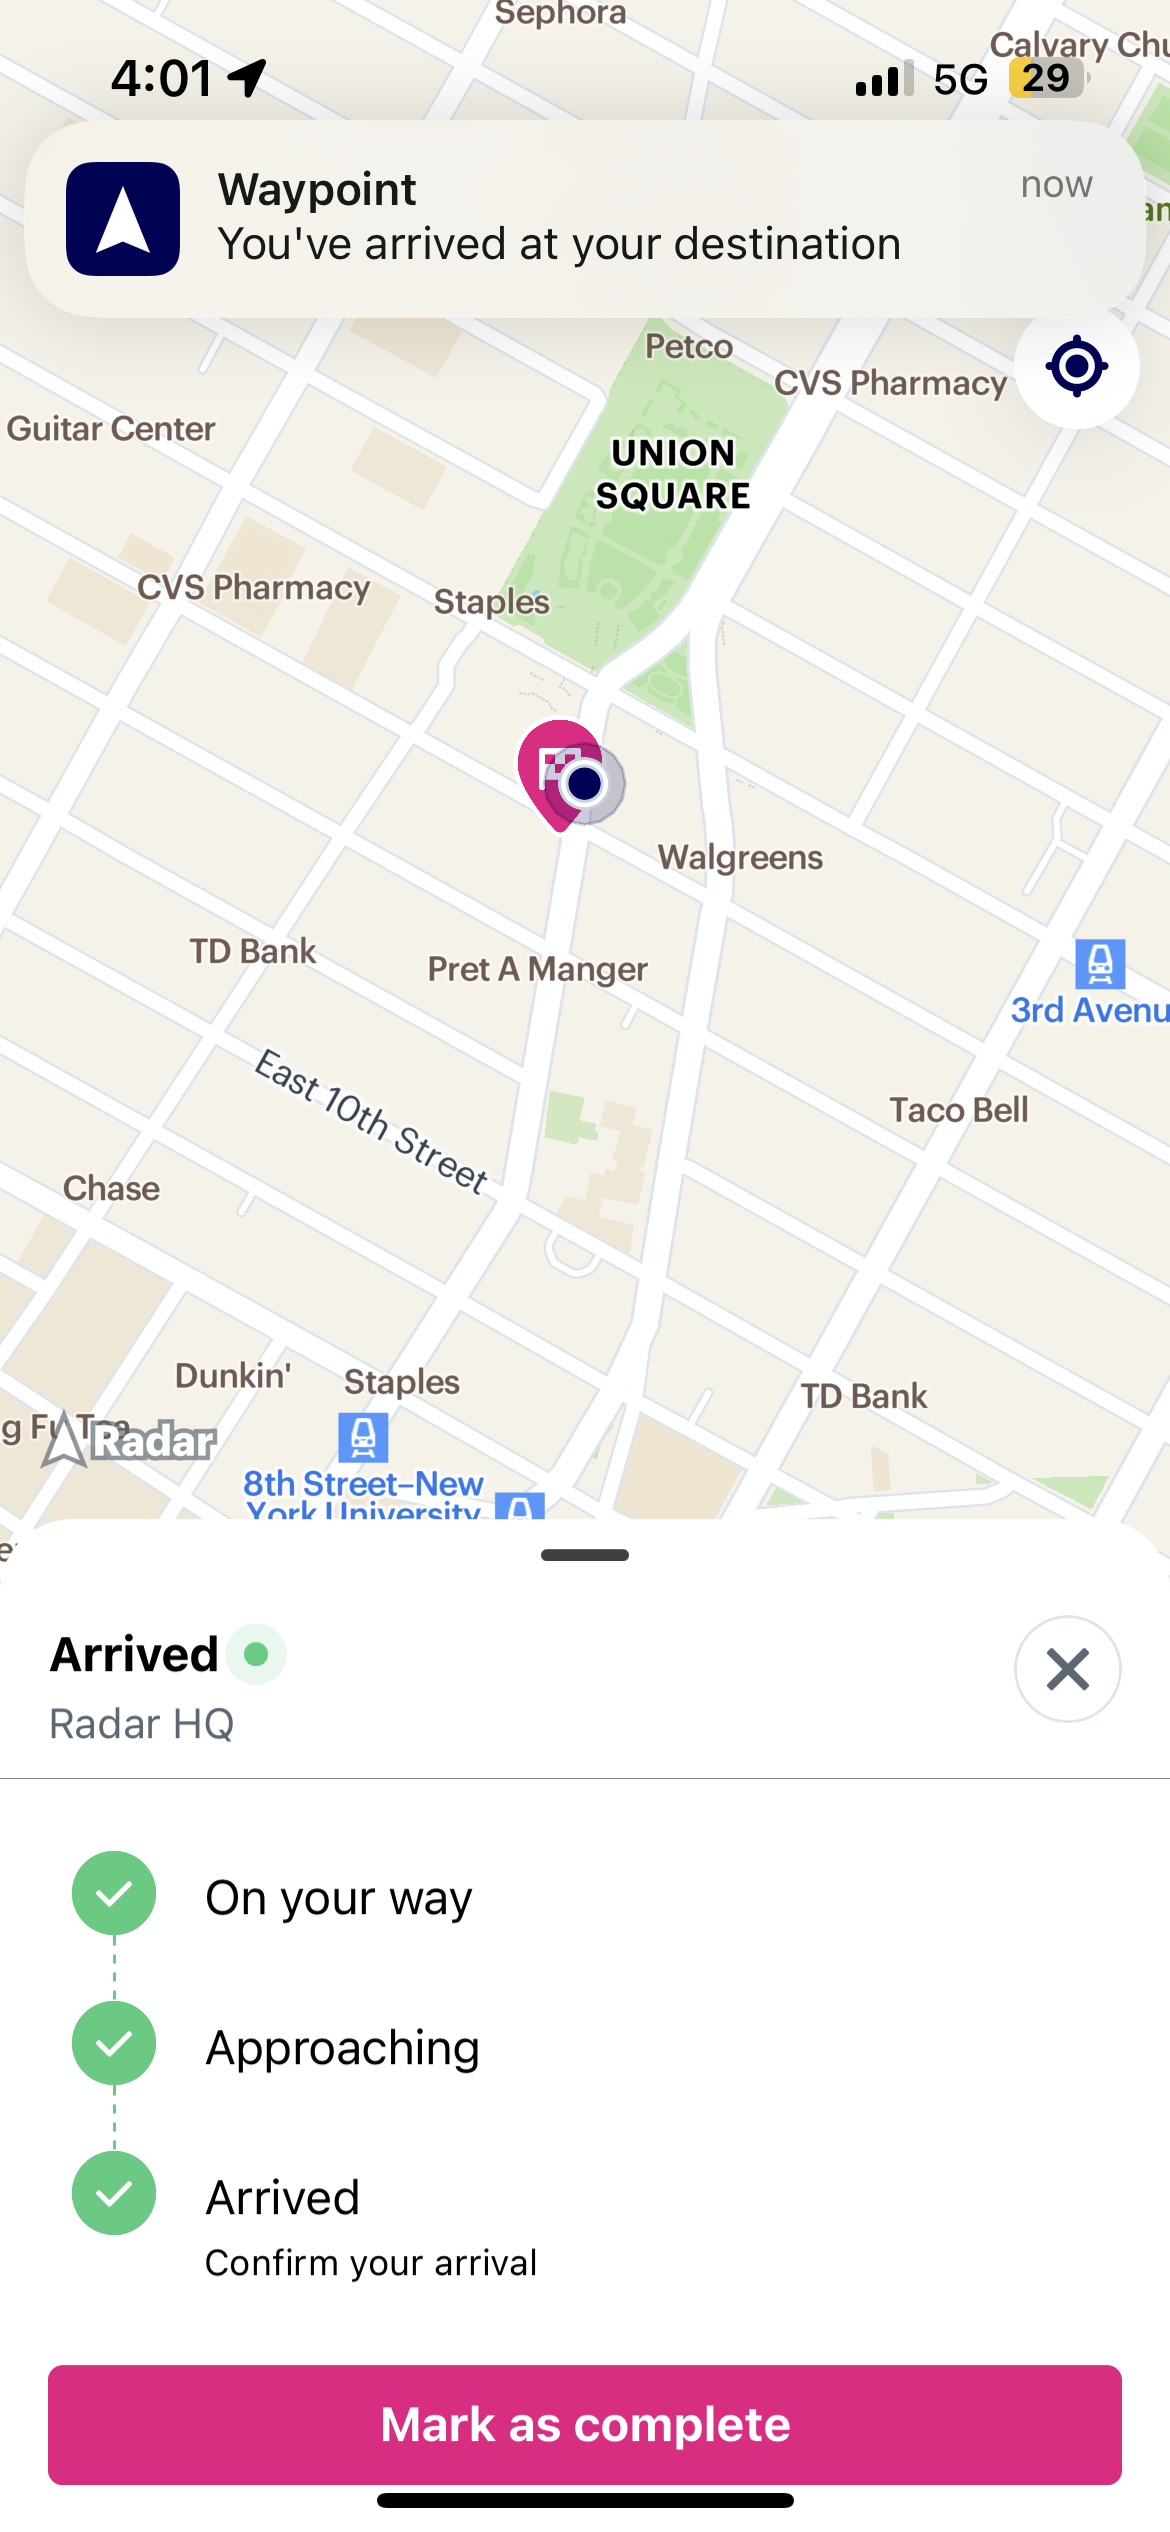
- user.arrived_at_trip_destination / user.entered_geofence -> "Arrived"
- Once you've arrived at the geofence, you can click either the "x" or button on the bottom of the screen. (See image D below)
- user.stopped_trip -> "Stopped trip" notification from Waypoint
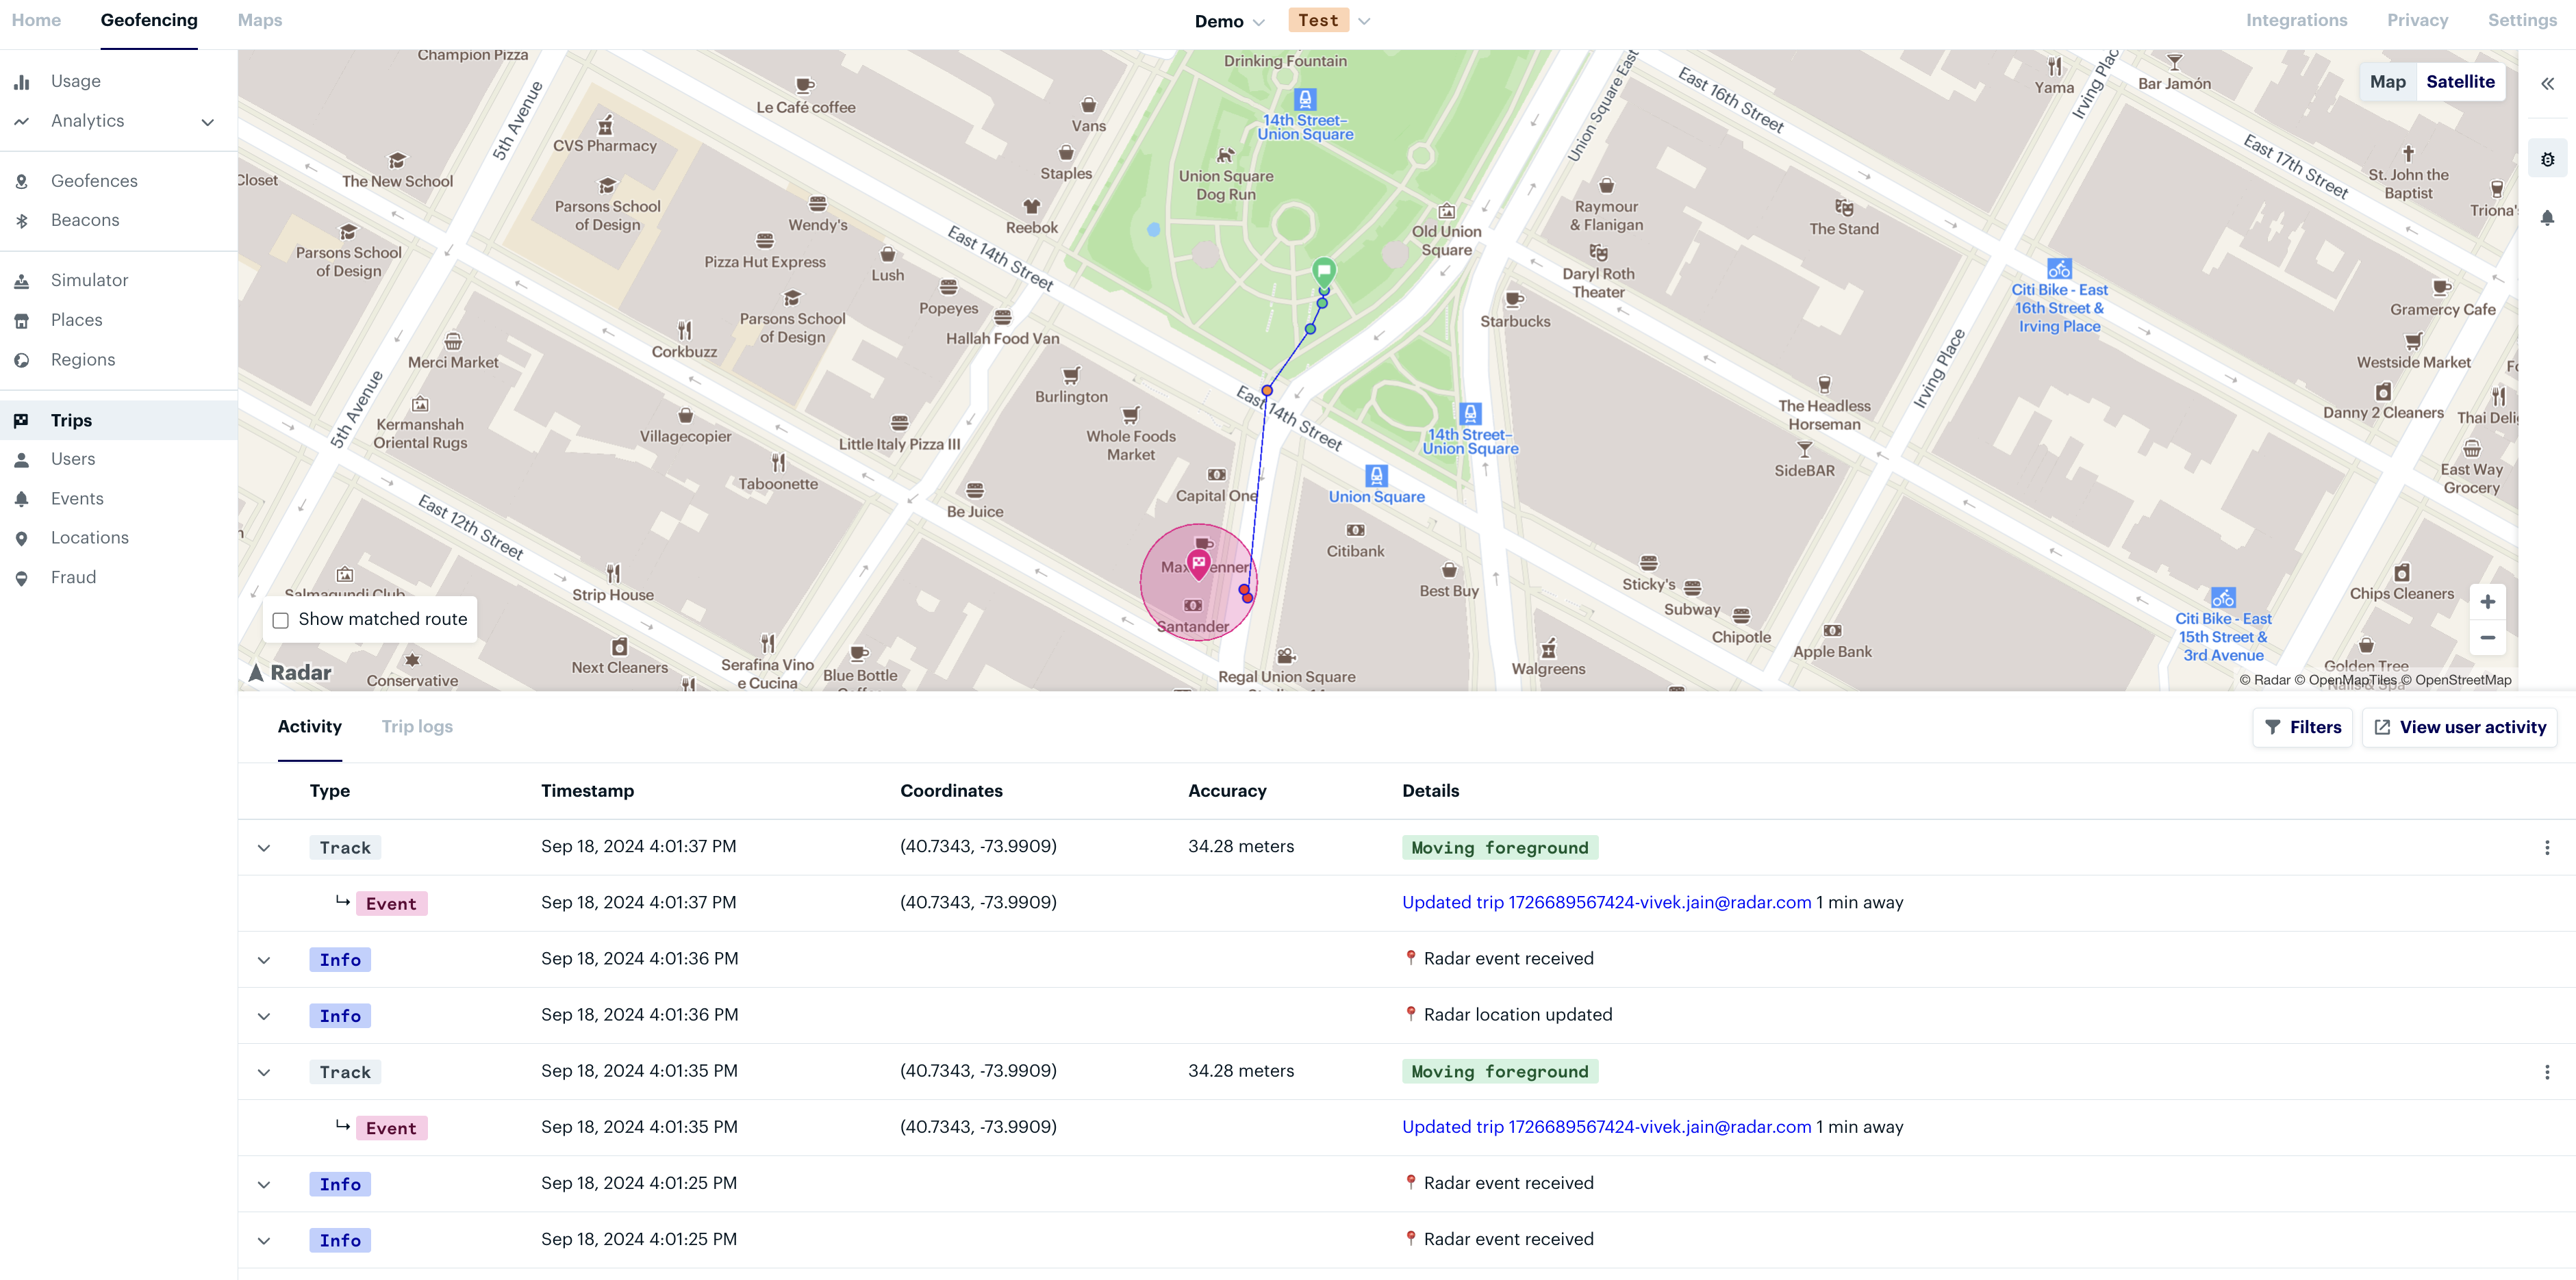
- Analyze trip updates/events on Radar dashboard. Navigate to "Geofencing" -> "Trips" -> click on trip you'd like to analyze -> "Debugger" on top right to view the trip data. (See image E below)


Testing Background Mode#
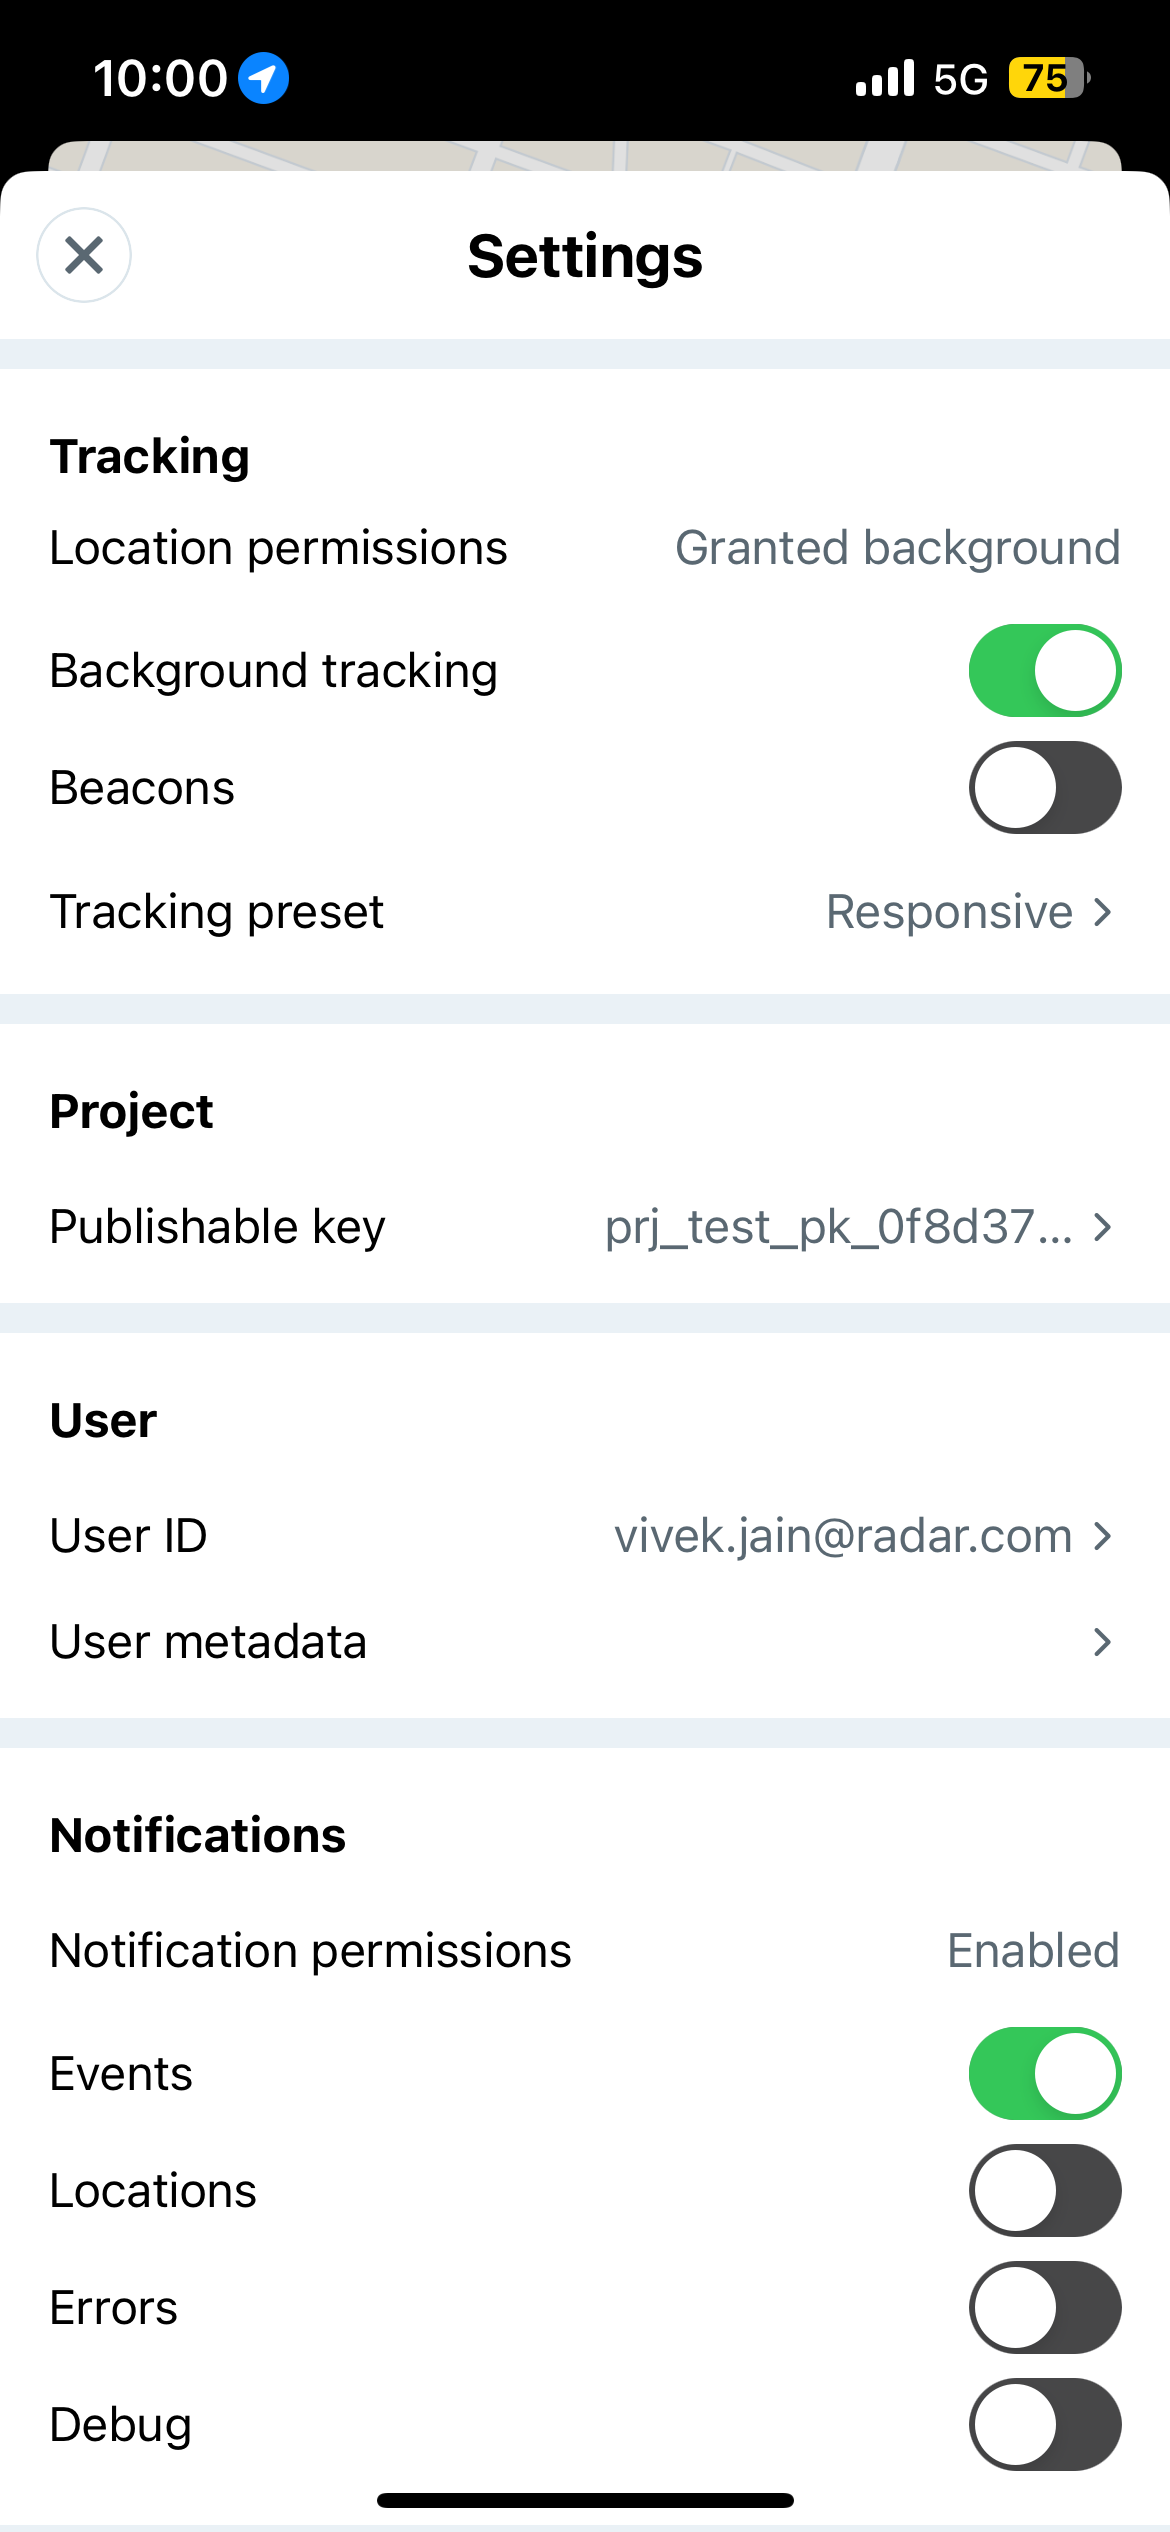
To get started, make sure you've opted-in to background or "Always allow" permissions and notifications are enabled. You'll have to navigate to your device settings to enable background tracking and toggle the "Background tracking" option in Waypoint. Click on the settings icon on the top right to ensure Waypoint is configured correctly. (See image A below)
Create geofences in Radar.
Open Waypoint and navigate to "My Location" tab. You should see "Not in a geofence". Travel to a configured geofence. (See image B below)
After entering the geofence, you should receive an entry notification while Waypoint is closed and/or your device is shut off. Once you open Waypoint, navigate to "My Location" tab. As shown below, Waypoint should show "Welcome to <geofence_name>". (See image C below)


Testing Beacons#
Note: You can test beacons in either foreground or background mode.
- To get started, ensure the following settings are enabled (See image A below):
- Opt-in to foreground or background permissions.
- Ensure notifications are enabled.
- Once you click on the settings icon on the top right, you can toggle "Beacons" on. This should prompt you to allow Bluetooth permissions. Alternatively, use remote SDK configuration & set beacons to true. Once done, you should see the "Beacons" toggle enabled within the Waypoint settings page.
Create beacons in Radar.
Open Waypoint and navigate to "My Location" tab. You should see "No Beacons Found". (See image B below)
After entering the beacon radius, open Waypoint, navigate to "My Location" tab. As shown below, Waypoint should show "<beacon_name>" under the "Beacons" section. You should also receive a notification "Entered beacon <beacon_name>". (See image C below)
Support#
Have questions or difficulties with Waypoint? Contact us at radar.com/support.